Hello Everyone,
I have changed my blog address and now am at:
simplysandylee.blogspot.com
I hope you will visit me there soon.
Sandy
Hello Everyone,
I have changed my blog address and now am at:
simplysandylee.blogspot.com
I hope you will visit me there soon.
Sandy
First, thank you to all who participated in the blog hop and especially to those who left comments. I am sure I speak for all the DT members when I say, we truly enjoy and appreciate every comment It encourages and inspires us, more than you know!
The winners from the Sparkle N Sprinkle “Sparkling Winter Sensations” Blog Hop have been announced. Here are the winners in case you haven’t seen the news as yet:
The Grand Prize is awarded to Mitzi Vogel!
Secondary winners (extra prizes)
1. From Barbara Bruder’s Blog – Peg Klitch YAHOO!!
2. From Eleanor Jenkins’ Blog – April of South Carolina
3. From Julie Zippel’s Blog – NWFlamingo
4. From Marie Berquist’s Blog – Lois (lew1993)
5. From Karin Martin’s Blog – Donna Levine
Congratulations to you all!!!!
More details (including details on what to do if you’re a winner) and a special thank you from all of us on the design team are on the “home blog” – Sparkle N Sprinkle blog.
Hope you join us for the next blog hop too!
Sparkle on
Sandy
A few weekends ago was really full! I had intended to post this then, but life got in the way, so I’m just getting to post now. Well, I attended a baby shower on Saturday for a good friend’s daughter. She is having a boy. This card was done with a metal stencil (first pounce back of stencil with powder) then lay it on Sparkle and Sprinkle sticker paper. Next carefully add holeless micro glass beads and rub into the open areas. Carefully remove stencil and apply glitter to the rest of the sticky paper. Finally its just a matter of adding the layers of colored paper for the finished A2 card. The mom-to-be loved it.

Boy baby shower card
Then on Sunday we had the double celebration: birthday party for our 3 year old grandson, Brian and a communion party for our 10 year old grandson, Diego.
The birthday card was e-a-s-y. I used a piece of dp covered with Disney characters. Cut them up into small squares, then put each onto glitter paper, then black paper and finally the purple metallic card base. This was a perfect card since they had just gone to Disneyworld a month ago, and we gave him a share of Disney stock for his birthday. Blogland isn’t cooperating, so it wouldn’t let me edit these pix …sorry. Here’s how the A2 card turned out:

3rd Birthday Card for Brian

Inside

Communion Card
Lastly, my hubby’s great niece graduated from pharmecutical school a few months ago but we were in Florida and missed the party. We were going to see her at the party so I needed to have her card. I used SNS stamp set 435-Graduation multiple times and colored it. Lay SNS super adhesive paper over stamped image, remove paper cover and then cover with holeless clear glass beads. Use a Spellbinders die to stamp the words onto. Layer with gold and black paper to make an A2 card. Full directions for this card will be on the Sparkle and Sprinkle web site in about a week.

Andrea's Grad Card
Hope that you found some ideas from these cards that you might use. See you again soon.
Sandy (Cheesy)
Welcome to the Sparkle N Sprinkle “Sparkling Wintry Sensations” blog hop—do you like how I changed my header picture for the occasion? If you arrived here by way of the Sparkle N Sprinkle Blog, then you’re in the right place. All of the rules and info for the hop and how to become eligible for SIX great prizes are back at the SNS blog, so I will not repeat it here.
On to the sparkly stuff! Here is my design which uses the Winter Swirl stamp set #414:

Winter Swirl Set 414 Diorama Card
When the blog theme was decided, all I could think of was what it looks like outside our windows (up here in Wisconsin) after a snowfall and I knew I wanted to make a diorama card (see the tips and techniques section at SNS for directions to make diorama cards.) Diorama cards are great because you get all that dimension but it folds up flat, fits into a regular envie and usually doesn’t take any extra postage. The Winter Swirl stamp set has all the stamps needed for this card. If you have the Grand Caliber die cut machine, you can diecut both pieces of cardstock at the same time–yippee. Sparkling snow glitter is the perfect tool for snow and winter scenes (or just adding sparkle to any card). This card does take extra time because of cutting out trees, and the extra layer but it is a wonderful gift for that special someone. If you have never made a diorama card, I hope you’ve gotten the inspiration to try one. The directions for this card can be found here.
Oh and by the way, I might be one of “The FIVE” with a secondary prize, so don’t forget to leave a comment below to become eligible for the Grand Prize and one of the 5 secondary prizes…………then head on over to our Sensational Dawn’s blog and continue on your sparkly, wintry way.
Stay cool and glad you came by!

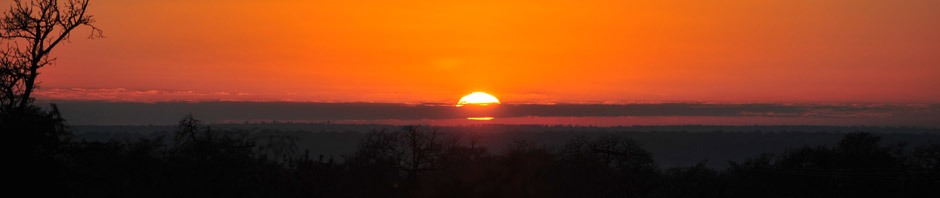
Winter in July?
Sandy
The Sparkle and Sprinkle design team is getting ready for our July Blog Hop which begins on Thursday, July 14. You can visit the SNS Blog here to get the details. In the meantime, here are some cards that I designed last year for SNS using their stamp set #420, Nestie Christmas Trees and the Spellbinders Christmas Tree die.

Flip Flop Tree Card

More views of the flip flop card
Here are some other views of the same card so that you might get the idea of how it opens. The directions to make this card are on the Sparkle N Sprinkle website here.
This is another card designed with the same stamp set and die which was an easel style card.

Nestie Christmas Tree-Easel card
You can see the directions for this easel card here.
Are you ready for more wintery inspirations??? Join the design team for all the fun (and prizes) starting Thursday when the Sparkling Winter Sensations Blog Hop begins (start the blog hop at the Sparkle N Sprinkle blog)! Hope to see you then…

Sandy
We are snowbirds, and so we arrived back up north on May 13th figuring it was in plenty of time for our 4th grandchild’s arrival on June 2nd. Well she surprised us by arriving 3 weeks early and is our very first granddaughter!
 Isabelle
Her mom, dad and big brother are all delighted to have her join the family. She is the first girl grandchild for both sides of her family.

Dad, Mom & Isabelle

Isabelle and big bro, Caleb
Grandma has been spending time at their house helping out and enjoying every minute. Gives her time to take lots of pictures. Here are a few of Isabelle EmmaLee to share with you:

Wide eyesFound my thumb!
The family also came to our lakehouse for the holiday weekend. It was Isabelle’s first time on a boat too! And big brother, Caleb loves it!

At the lake with our hats on
Thanks for stopping by and sharing our blessed event! See you soon.
Sandy (Cheesy)
Welcome to the Sparkle N Sprinkle “Not So Macho Masculine Card” Blog Hop! You are in the right spot if you arrived here via the amazing Patti White’s Blog. If you’d like to start from the beginning and become eligible for great prizes, then click here (that’s where you’ll find all the directions you need to hop along).
As I thought about what I’d like to do for this masculine blog hop and the golfers stamp sets I was using, I thought about my two sons and husband and how they would give their presents – – usually still in the bag they brought it home from the store in. As the boys got older, we started using old newspapers and paper bags to “wrap” the gifts because it “looked my masculine”. Thus, my first creation: brown paper bag gift wrap!! LOL

Paper Bag Gift Wrap
It’s really simple: just cut open a brown paper bag and stamp to your heart’s content. Add some raffia “ribbon” and a tag. To make the gift tag, simply fold a piece of glossy cardstock in half, place it in a Spellbinders circle die leaving the fold outside of the cutting circle. The result should be a mini circle card. Then stamp and emboss the words in black detail embossing powder on the front of the card/tag. Run the front thru a die cut machine using the Cuttlebug Swiss Dots embossing folder 37-1604 (but put the paper in so the back is facing back–this will “de-boss” the image). Viola! A golf ball gift tag for the present. Here’s a close up to see it better.

'Golf Ball Gift Tag
Then I made a card to go along with it. First die cut 4 small circles for golf balls and emboss the letters G,O,L and F from stamp #549-255MS on them before putting them thru the embossing folder. (Hint: ink stamp and then put scotch tape over the part you do not want to show). Remove protective cover from 1/2 of sticker paper, lay ribbon and the golf balls onto sticker paper. (Hint: work on half of the sticker paper). Apply Palm Green Flock (FL115). Make a larger golf ball. Stamp Father’s Day #563-255B as above, remove paper from sticker paper. Lay down golf ball and words, then apply flock. Stamp Joe Cool #214-255G, colored him and cut him out. Pop dot him on top of the golf ball.

Father's Day Golf Card
You can see the detailed directions for this card here.
I used two SNS sets for my projects: Golf-McDuff #255 and Golf-Live Laugh Golf Set #192
We get to donate one product towards the grand prize! and I chose the Palm Green Flock (FL115) which was used on my card. I love to add texture to cards and flocking is a great way to do that. I am so excited to give you a sneak peek of this product as it is not yet for sale, so whoever wins will have this flock before anyone else! Isn’t that exciting?

Palm Green Flock FL115
Don’t forget to leave a comment to become eligible for the prizes, then hop on over to Julie’s blog to see her phenomenal creations.
Thanks for hop, hop, hopping by – – and I hope you enjoy the really amazing cards along the rest of the trail.
Sandy

Card 1 - Cork Zebra
This card idea came from a lady on the stamping cruise (sorry, I cannot remember her name). She had some awesome animal stamps and was trying to stamp them onto cork that she had. When I got this stamp set from Sparkle and Sprinkle and saw the zebra, I knew I had to make a card using cork. The card is pretty basic: emboss the zebra using black detail embossing powder onto an adhesive cork sheet. Then use the EK Success plaid edge punch #54-40089 for pieces of black cardstock glued all around the edges and a craft cardstock base. I wanted to add more embellishments, but I think it looks good just as it is.

Card 2 - Split Negative Zebra
The second card idea came from watching Gina K videos where she was doing split negative cards. I took it one step further and did 4 pieces instead of just 2. The basic idea is to stamp your design onto black paper and emboss with white embossing powder. Then stamp the design again onto white paper and emboss with black embossing powder. Cut the 2 images in half and place half of each one with the other. Kind of like a mirror image. I used “boa” yarn to edge the image and placed it onto green corregated paper then onto black cardstock to finish. Its kind of an optical illusion card!


Jill's Never-ending Easter Card
Easter cards this year were easier than in other years. While on our Sparkle and Sprinkle stamping cruise, one of the other teachers, Jill, was demo-ing this card and she let me stamp pieces for my three grandson’s cards. It is a never-ending card which I am sure the boys will enjoy playing with. And the Easter chicks, bunnies and eggs from the Easter Chicks Stamp Set 426 are fun and colorful. Here is a link to Jill’s card with all the directions. It is a fun card style but I will warn you that it does take a bit more time than usual. LOL
Happy Easter to All!
Sandy
Just a quick note to let you know that I’ll be doing a class on Wednesday, March 16th. We will be doing 3 glitter-ific stained glass cards, so be prepared to use lots and lots of glitter…..oh and some glue and acetate as well. The cards will be great to use for Easter, Mother’s Day, Birthdays or whatever you can think of.

2 glittered stained glass cards
The glitter isn’t showing up as much in the pictures as in real life.
Class times are 10 am – 12:30 pm; 1:30 pm- 4 pm; and 6 pm – 8:30 pm.
Place: Sparkle N Sprinkle Shoppe, 2701 College Ave. E, Ste #7, Ruskin FL. Maybe I’ll see you there.
Its late, so that’s all for now……….
Thanks for stopping by
Sandy
